Winter Yellowstone Photography Strategies
The next photo tours in Yellowstone I am leading take place in early 2020. Here are the dates:
Jan. 19 - 25 or Jan. 26 - Feb. 1 or Feb. 2 - 8, 2020

Palette Springs at Mammoth, Yellowstone National Park
Touring Yellowstone National Park during winter has been a passion to me for decades. Around 1990 I began leading photo tours during winter in Yellowstone by snowmobile. Over the years, I have led more than 100 week-long photo tours! These tours are ideal for me because I love photography, Yellowstone, and riding snowmobiles. I had the combination of photo skills, teaching ability, park knowledge, and snowmobile know-how to make it all work tremendously well. In 2014, with the cost of using snowmobiles to transport clients to the best photo spots in the park becoming prohibitive, I switched to using snowcoaches. Driving snowmobiles is more fun to me, but snowcoaches are easier on my clients, and as I age, I now appreciate getting out of the cold weather and having a cup holder for my coffee! And now with the evolution of "big wheels" on snowcoaches, I am now able to take photo tour participants to places that vehicles with skis can't get to.

Firehole Falls - Add light until the first blinkies appear in the snow
Equipment I would take:
Canon 5D Mark IV with at least two extra camera batteries
16-35mm
This lens on a full-frame sensor is far less useful that a slightly longer one. Of all the lenses mentioned here, this one I use the least during winter in Yellowstone. Many of the landscapes are in thermal areas where it is illegal, and more importantly, downright dangerous to walk in the thermal areas making it difficult to get super close to the foreground – though possible at times. I do like this lens for a Firehole river bend downstream of Firehole falls where it is needed. And I use it at Grand Prismatic spring when you catch good light and not too much steam at this famous feature where the near foreground is stunning, and the background hill is appealing, and I use focus stacking to cover the depth. But, if weight must be eliminated, this lens is optional.
24-70mm
I frequently use this lens and would never be without it. This focal-length range is crucial for Yellowstone landscapes. The 24-105mm lens is a superb substitute for this lens.
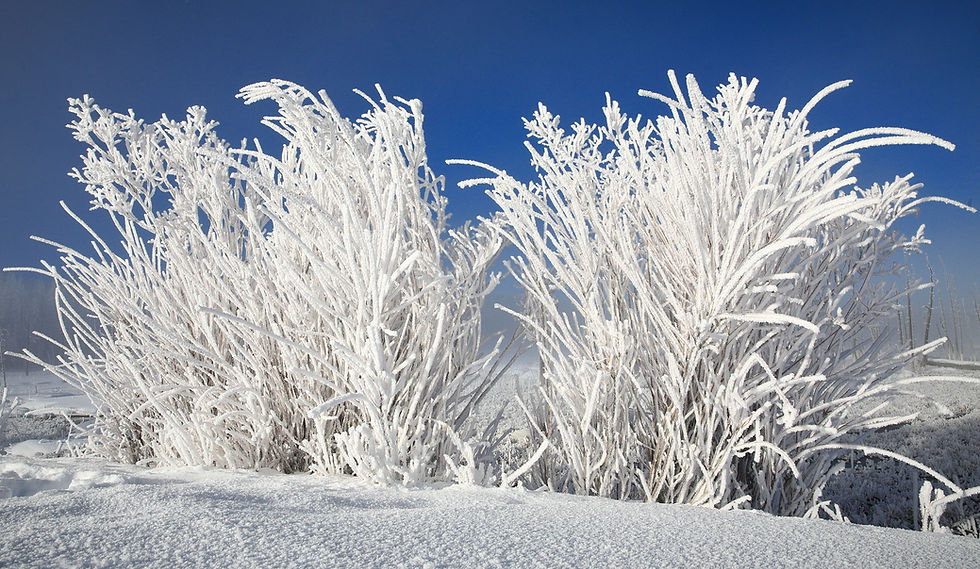
A 24-70mm lens nicely covers many small landscapes in Yellowstone.
70-200mm and 100-400mm lenses
Both of theses lenses are useful at times to isolate small portions of the scene. I especially like them for isolating scenes in Hayden valley and the meadows north of Norris Geyser Basin.
When I have space available, I take my Canon 800mm lens for distant wildlife. Meadows are big at Hayden valley and Elk Park, and wildlife may be seen hunting at quite some distance. Sometimes they hunt close enough where long lenses of 500mm and longer make nice images of the predators.
A polarizer that fits on all lenses between 16mm and 400mm. The polarizer is crucial for all rivers and waterfalls, and wet rocks in the thermal basins. Normally the polarizer is not necessary to darken a blue sky as the sky is dark blue anyway on most clear days due to Yellowstone’s high altitude. On overcast days the polarizer will not darken the skies, but it is still effective for water reflections.

A polarizer reduces the glare in this wet trickle revealing the yellow underneath.
Sturdy tripod with a Kirk BH-1 ballhead
Canon 600EX-RT Speedlite with a ST-E3-RT flash controller that is radio and wireless
Photo Techniques
You must be “rigidly flexible.” Often clients want a daily schedule for their trip, but that is not possible if we are to make the best use of our time in the park. Because the weather is not that predictable, first I must see what the conditions are to decide how to make the best use of our time. I have excellent choices to take groups for cloudy days, snowy days, and clear days, and choose the park destinations once I see the weather conditions at the moment. Weather forecasts are worth checking, but often they are wrong and that is especially true in the mountains.
Snowy days are great for wildlife, especially big dark bison because the falling snow readily shows up against the dark furry bison background. Clear is best for all thermal areas like Biscuit, Black sand, Upper and Lower geyser basins, Norris geyser basin, and Midway geyser basin. You need blue sky to make steam appear strongly in the image. And some sun and clouds are terrific for Hayden valley. Overcast days without snow are excellent for all waterfalls and the Grand Canyon of the Yellowstone because the light is low in contrast and snow isn’t obscuring the scene. Overcast is fine for wildlife too.

Snow against the dark fur of a bison is always a winning image - so much mood to it.
From more than 500 days in Yellowstone during winter, I know many fine shooting angles that most photographers miss, and I always share these with my clients. For example, Firehole Falls is an obvious subject, but there are many ways to photograph it, and some excellent rivers scenes are found there too. I make sure my clients work the area.
EXPOSURE
Since the percentage of darks and lights in the image may vary considerably from shot to shot as you change composition amidst all the snow, the best exposure mode for digital cameras in the snowy winter is full Manual exposure. I typically select my preferred aperture, use a low ISO such as ISO 100, and then adjust the shutter speed to produce the first blinkies in the white snow. I know I have the first blinkies when I shoot an image and play it back to see if the image has blinkies and how many. The quick way I use to get to the first blinkies is to use live view and adjust my shutter speed dial to move the rightmost data of the live histogram over to the right histogram wall. Then I shoot the image to see if blinkies appear. If not, I add another 1/3 stop of light, and shoot again until the first blinkies appear. If there are too many blinkies, I subtract a little light, shoot another image, and check to get just a few blinkies. Many might say one should avoid blinkies as they indicate highlights that are overexposed. And this is true if you are shooting JPEG. But, when shooting RAW files, the highlight alert and the histogram are both derived from an embedded JPEG in the RAW file, and not from the RAW data that covers a wider contrast range. The first blinkies do not indicate highlights that are overexposed in the RAW file, just that you are getting closer to overexposed. Most cameras can go about one stop past the first blinkies before highlights are overexposed in the RAW file. This does of course depend on the camera model and you should test it to see what works best for you.

While taking a private day trip along the road through Lamar valley, I found a small herd of Bighorn sheep. I manually metered and set the exposure to produce the first blinkies in the snow, and used that exposure for all the sheep shots I made.
While I tend to use ISO 100 when shooting winter scenes in Yellowstone, wildlife is a different matter altogether. Then I go to ISO 400 or ISO 800, push the shutter speed up to about 1/500 second if there is enough light, and use whatever aperture I must to use my ISO and shutter speed choices. For coyotes hunting and freezing the action of their jumps, I typically use a shutter speed of 1/2000 second for sharp images.
White Balance
Many photographers are careful to select a white balance on their camera to make their images better. For example, when photographing in sunshine, many select SUN or DAYLIGHT white balance. On cloudy days, they use CLOUDY white balance, and when photographing in the shade on a sunny day, they use the SHADE white balance. Selecting the appropriate white balance is crucial for JPEG images, but completely unnecessary when shooting RAW. Large RAW files give you the opportunity when processing them to modify the white balance easily without any loss of quality. Therefore, I use Auto WB to let my camera get the white balance close to ideal, and then I always tweak the white balance when I process the image. Since I use Auto White Balance, this is one less thing I need to be concerned with.

Palette springs under a dark cloudy day. The light is bluish in the overcast light, but when processing the RAW file, I added a little bit of yellow to subdue the blue colorcast somewhat, but I did allow some blue to appear in the snow.
STRATEGIES FOR SHARP IMAGES
Although most prefer to shoot handheld during winter, whenever possible, I use Gitzo tripod legs (Model GT4533LS) and a Kirk BH-1 ballhead. My cameras all have L-plates attached to them so I can mount the camera vertically or horizontally with ease while keeping the camera/lens on top of the tripod. I don’t have to flop the gear over for verticals. This makes things so much easier. All lenses that have collars have a quick release plate attached to the lens collar. I do admit in the thermal areas where short lenses are most commonly used, when using higher shutter speeds, shooting handheld does deliver excellent results.
For all my landscapes shot on a tripod, I manually focus on the most important spot where sharp focus should be using a magnified live view image on the LCD. This works well! If the foreground is quite close to the camera, quite often I use f/8 and focus stack by shooting a series of images where sharp focus is on the foreground and the background and all points in-between. I typically start with the foreground and manually change the focus to make a plane sharp a little further from the foreground until I finally get to the background. I never know ahead of time how many shots I need to shoot to cover the depth as it depends on the depth you wish to cover. Please read my detailed article on focus stacking on my website.

While I normally use a tripod for better image sharpness, it is not necessary when shooting a wide-angle lens with sufficient shutter speed. Here is Old Faithful on a breezy day late in the eruption cycle when the wind blows the steam over more.
For wildlife, I use the tripod I mentioned with a Wimberley gimbal head as this perfectly balances my gear without locking the camera position thus making it easy to pan with moving wildlife. For most wildlife in Yellowstone, I use autofocus set to the back-button focus control. It depends on the camera model, but my Canon cameras come with back-button focus control on the AF-ON button and it is on by default. Of course, focus is also on the shutter button and that requires going into the menu to turn off the autofocus on the shutter button and leave it set to only metering. All my lenses where I use autofocus are AF microadjusted to achieve precise focus. And I do set my three Canon autofocus parameters to: Tracking Sensitivity +2, Accel./decel. Tracking 0, and AF pt auto switching to +1. Depending on the situation, I might change Tracking Sensitivity. If a subject is flying against a background with detail – for example a trumpeter swan flying down the Madison River – then setting the Tracking Sensitivity to -2 slows the autofocus from jumping to the background should the active AF points wander off the swan while panning with it.
FLASH
I use flash at times when making winter landscape images of Yellowstone. On the dark cloudy days that are more common than I would prefer, flash is useful for lighting a foreground subject to make it stand out against a dimmer background. Typically, I use the flash on manual and control its output by adjusting the zoom on the flash head, the power ratio, or the distance I hold the flash from the subject. My flash combination is a Canon 600EX-RT Speedlite with the ST-E3-RT radio flash controller. Since my flash is wireless, I can walk around my tripod-mounted camera and shoot the flash remotely from various angles. I fire my camera by pressing the Release button on my flash--it is incredibly effective. The flash is also very useful on snowy days since firing it near the camera and toward the subject lights up blowing snowflakes. Showing some sharp snowflakes in the scene is appealing to me.
POLARIZER USE
Many have trouble telling when their polarizer is removing glare from wet rocks and flat water in the rivers or waterfalls. I just look at those flat areas where the most glare occurs, and then turn my polarizer to darken the light portions of the flat water. The water darkens because glare is removed with the polarizer. This darkens the river water and saturates colors in the scene.
TRIPOD
Most clients prefer to shoot in Yellowstone handheld. That does work if you are using short lenses with faster shutter speeds, but in most cases, you achieve more sharpness by using a tripod. I am super keen on producing quality images and part of quality is sharpness. I use a tripod, shoot in live view to get the mirror in the upright position, and on my Canon 5D Mark IV, my shutter is also open prior to the exposure being made. All of this eliminates vibrations from the moving shutter and the mirror. There are some shots where I absolutely must use handheld techniques such as the beautiful scene of the Yellowstone River from the Chittenden Bridge and Old Faithful erupting. To shoot the Yellowstone River from the bridge, I kneel on the bridge next to the railing. I lay my arm on the railing, and then put my camera being held by my other hand on top of my arm. Essentially, my arm serves as a bean bag and I get sharper images this way.

Chocolate pots requires a longer focal-length lens to reach across the Gibbons River. A tripod is essential for excellent sharpness and careful focus.

A Trumpeter Swan stretches its wings.
Midway Geyser Basin patterns in the runoff with Excelsior Geyser steam in the background.
Geysers
I really enjoy photographing geysers, especially in winter. My favorite is Castle geyser, but it only erupts once every 12 hours or so, so most groups don’t get to do it. Old Faithful is reliable and erupts often enough (about every 90 minutes) so it can always be photographed. Of course, Old Faithful photographs best with sunshine on it, a blue background, and no wind. The lower the wind, the higher the steam rises into the sky from Old Faithful. Most photographers walk out to the circular viewing area and shoot if front lit – which is probably a big mistake! Front light makes the geyser images look too flat as texture in the geyser’s steam is minimal without shadows. A much better angle is to shoot the geyser side lit or backlit. The shooting angle creates highlights and shadows in the geyser and makes the “steam tornado” far more interesting to view and photograph. When shooting backlit, it is also possible to underexpose the scene, stop the lens down to f/22, and produce star-burst images!
Again, the geysers work best with manual exposure because if your preset your exposure based only on the geyser cone before the geyser erupts, the meter “sees” a lot of lighter areas in the image when it erupts and that causes underexposure when using any auto exposure mode. Better to pre-meter the steam coming from Old Faithful before it erupts and use that when the main show happens. As for sharp focus, I back-button autofocus on the cone of Old Faithful, and then let up on the back-button to lock focus when the geyser erupts. Whatever you do, never be downwind from erupting geysers and let the emitted water land on your lens as it contains harmful particles that can seriously damage your lens!!!

Old Faithful backlit better reveals the shape of the steam due to the shadows. Here I stopped down to f/18 to better capture a sunstar.
Focus Stacking
Coyotes, red fox, bison, and other wildlife tend to be too active to focus stack. In many scenes, the closest object included in the image is already at or close to infinity focus, so again, no focus stacking is necessary. But many scenes have near strong foregrounds with backgrounds that reach infinity focus. That is where focus stacking is king to cover the depth of field. Sometimes my foreground is only a few feet away, so I cover the depth in the scene by focus stacking. Here is how I do it. First, I handhold my camera and find the composition I want to use. Then I mount the camera to my Gitzo tripod, fine-tune the composition, turn on live view to see my live histogram, shoot an image to check the histogram in playback, and perhaps adjust the exposure until the first blinkies appear in the image. To check the exposure, the scene does not need to be in focus. Once I am ready to focus, I use live view and manually focus on the closest object appearing in the image. For best results in focus stacking, I tend to use f/8 as that is one of the best apertures to use for sharpness. So, I focus on the foreground, and my first shot is an image of my hand. Why? My hand marks the beginning of the stack. Now I shoot the first image of the stack, and then manually turn the focus ring on my lens just a little toward a more distant focus point and shoot another image. I keep this up until I am finally focusing on the furthest element in the scene and shoot that one. Then I take yet another image of my hand to mark the end of the stack. All the images between the two out of focus images of my hand are my stack. If I don’t need all of them, then I don’t have to run them with the stacking software. There is no set number of images that your stack must have. It depends on magnification and the range of focus you are covering. Most landscapes I find require three to up to ten images in the stack. I should also note that some camera models, such as the Nikon D850 have focus stacking built into the menu thus automating some of the procedures I do manually.

A dozen images were focus stacked and combined with Helicon Focus software. This is the runoff patterns at Grand Prismatic Spring.
I process the images first using Canon’s DPP4 software. Then I do a batch process to convert them all to JPEGs. These JPEGs are new files and the original RAW files are still available to me for later use. Then I use Helicon Focus to combine them together. The software merges the sharp areas in the group of images into one image. Should an area not be in sharp focus in any image, that area will be soft in the final image produced by Helicon Focus.
Wildlife
Again, manual exposure is king in the snow because when the size of a dark animal changes amid all the white, autoexposure methods adjust the exposure and do it wrong. You are better off to set the exposure manually to lock it in. I select the shutter speed and ISO I need to get sharp images, and then meter by adjusting the aperture until I get the first blinkies in the snow. If a large dark bison is my subject, then I find the first blinkies, and add one-third stop more exposure to produce what I call the “second blinkies” to be sure of getting good detail with low noise in the dark bison fur.
Though, I prefer manual focus, for wildlife autofocus is nearly always necessary. Depending on the animal, I might use back-button focus set to AI Servo. If I want to lock the focus, I just point the active AF point at the animal’s head, press the back-button to focus the lens, and let up on the button to lock focus. If the animal is moving, then I hold the AF spot on the head, press the back-button in, and shoot at the same time. For subjects that are easy to track, I often keep the autofocus on the shutter button, and merely move the single active AF point over to the animal’s head when I have the desired composition. I track the subject with the AF point on its head, hold the shutter button down a little to initiate autofocus, and then press the shutter button all the way down to shoot the images.

A bison stands quietly in the snow. I had to use manual focus using live view and magnified its face by 10x.
Concerning autofocus, I strongly advise you to AF Microadjust your lens on the camera you are using. With DSLRs, the autofocus is typically never precisely correct (to be precise, none of the lenses I have tested were precisely correct with the factory settings) and now many cameras are providing the tools to let you AF Microadjust them. This is crucial. I have tested at least twenty lenses so far and all benefited from a slight AF Microadjustment that produces sharper images. If the camera focuses at the default setting a little too far away, then it is said to have a back-focus problem. If the lens focuses a little too close, then it is front focusing. AF Microadjustment (a Canon term) or AF Fine-tune (Nikon term) are important to achieve precise focus. All my Canon lenses benefit from it. And if you use teleconverters (perhaps a 1.4x or 2x), you should AF Microadjust the lens, converter, camera combination.
There is one exception where I use manual focus on wildlife in Yellowstone winters. Sometimes it is snowing heavily, and that causes autofocus fits! The autofocus keeps jumping back and forth as the autofocus “sees” the snow and keeps thinking the subject is at another distance. It that case, turn off autofocus, compose the animal, and usually they are holding still in heavy falling snow. Using a magnified live view image manually focus on the hairs on the animals face as best you can. It isn’t always easy to manually focus amid the swirling snow, but you can do it well if you are careful. Since it is easy to misfocus, I will manually focus on an animal, shoot several images, then take the lens out of focus and do it again. Hopefully, one of the manual focus attempts will be precisely on the critters face!!!

Manual focus using a magnified live view image was the best way to focus precisely on the face of the Grizzly Bear at the Bear and Wolf Center in West Yellowstone.
My Canon 800mm lens is AF Microadjusted to a -3 setting when used on my Canon 1DX Mark II camera. The camera and the lens are a combo and when AF Microadjusted, it focuses precisely where the active AF point is located. In this case, right on the coyotes face between the eyes. A -3 correction is actually quite small, but does produce slightly sharper images!
Quality Images
Use a tripod or steady the camera on a stump or tree. If no stump or tree is available, turn slightly sideways and tuck the elbow of the supporting arm firmly against your ribs.
Don’t use UV filters as they cost you sharpness
Use a Lens HOOD! This is absolutely crucial as it reduces glare and “discourages” snow from homesteading on your lens element.
Use low ISOs when possible
Keep the shutter speed up when handholding or when using longer focal lengths to photograph wildlife
Expose for the highlights
Use techniques that produce sharp images
Have fun and enjoy your Yellowstone Adventure!
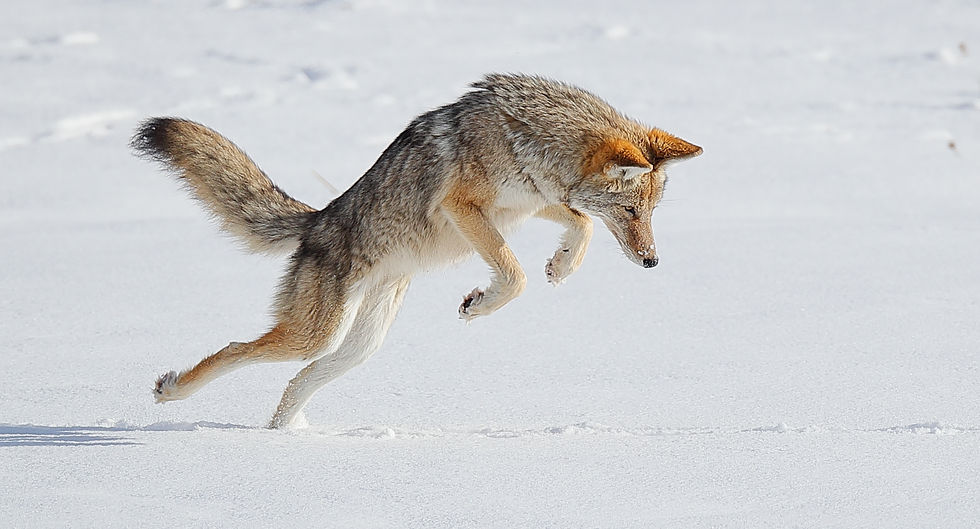

The coyote is leaping to pin a vole under the snow. For wildlife where snow is not causing focus problems, I use my Canon 1DX II with the focus set to AI Servo (continuous autofocus) and shoot at 14 images per second. I move my single active AF point around to coincide with the head of the coyote in these examples.
Protect Your Gear
It is best to carry your gear in a padded camera bag or lens bag when not using it. On really cold days, it might be necessary to put your camera bag in a plastic garbage at the end of the day while outside, and then seal the plastic bag and leave it in your room to warm up slowly to avoid condensation. But that assumes your gear is cold. This is important on snowmobile photo tours, but much less so for snowcoach tours as the warmer interior of the snowcoach keeps your camera gear from getting too cold. At the end of the day, if it is above 10 degrees F (nearly always), and you are riding into West Yellowstone on a snowcoach, it isn’t necessary to put your camera bag in a plastic bag.
Please join me and Dixie Calderone in Yellowstone in 2020. We take two groups of eight clients in two snowcoaches. A couple seats are empty to allow more storage. We enter the park at 8 am right around sunrise and don’t return to West Yellowstone until we lose the light around 5:30 pm or a little later if clear. In the evening hours, we present teaching programs and view some images you bring from home! This is an intensive photography tour with a lot of teaching in it. As we have photographed Yellowstone in winter for decades, we spend our time helping you learn your photo gear and shoot outstanding images. And since we live in the area and know many of the business folks in West Yellowstone, our prices are considerably cheaper than others. We are the most experienced Yellowstone winter photo tour leaders in the business, and we know cameras and photo techniques tremendously well! We have a reputation as awesome tour leaders! You will see why when you travel with John and Dixie.
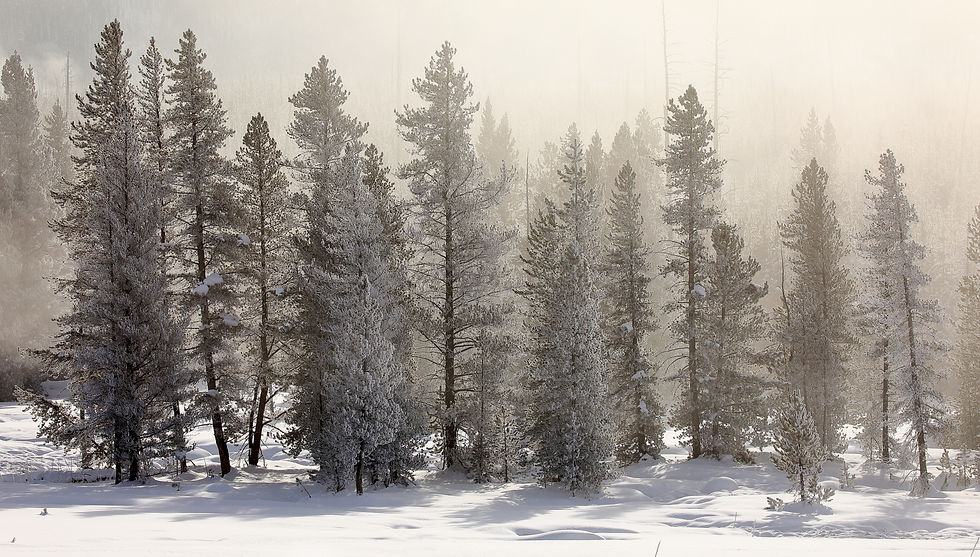
The fog begins to lift at Elk Park north of Gibbons falls on one cold frosty morning. As with most landscapes, I prefer to focus manually using the magnified live view image, and shoot with live view on to reduce shutter and mirror vibrations.

Sometimes we get lucky and find a bald eagle perched along the river where they pose for quite some time. Here I used a tripod, Canon 600mm, and a Canon 90D with a 1.6x crop factor sensor. That makes the angle of view equivalent to a 600 x 1.6 = 960mm lens.
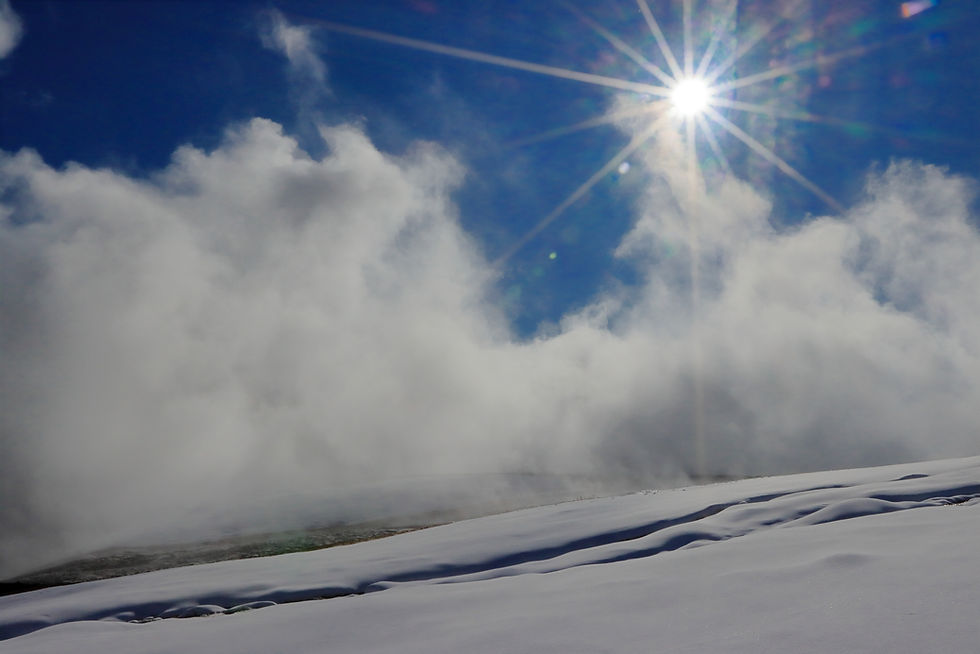
Use a wide-angle lens, stop the aperture down to f/22, and underexpose the snow and blue sky to make the sunstar pop!!!!
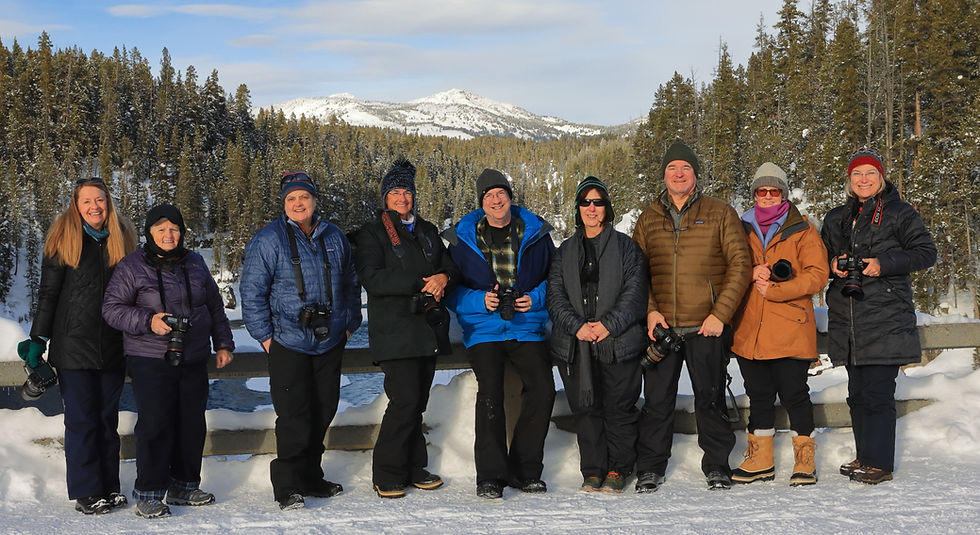
Dixie on the left and a happy group of photographers on the bridge over the Yellowstone River near Upper Falls.
John’s Web Site: www.gerlachnaturephoto.com
John’s Facebook page: www.facebook.com/JohnGerlachPhotoWorkshops
John’s Flicker page: www.flickr.com/photos/142501139@N02
Flicker page for Yellowstone tour clients: www.flickr.com/groups/yellowstonephotos


